
No products in the cart.

Enhance Your Workspace – 5 Efficient Steps Using A Self-Adhesive Cable Channel
by Supradec
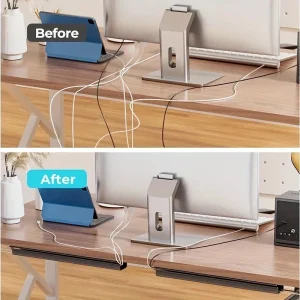
Cables can create a chaotic environment if not organized properly. Streamline your setup by utilizing self-adhesive cable channels for workspace organization and maintaining a clutter-free environment.
Explore our five efficient steps to effectively implement self-adhesive cable channels in office or home, ultimately leading to improved focus and efficiency.

Key Takeaways:
- Organization: Self-adhesive cable channels help to organize and conceal messy cables, creating a cleaner workspace.
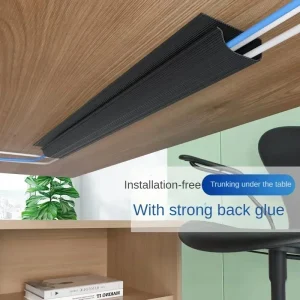
- Installation: These channels are easy to install without the need for tools, reducing setup time and effort.
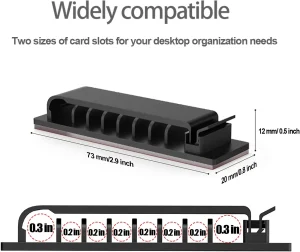
- Versatility: They can be applied to various surfaces, allowing for flexible placement in both home and office.
Self-adhesive cable channels help conceal tangled wires to get rid of the eyesore in 20 minutes or less
What Are Self-Adhesive Cable Channels?
By definition, self-adhesive cable channels are versatile strips designed to hold and organize electrical wiring. At Supradec they come equipped with adhesive backing, making it easy for users to attach them to various surfaces without the need for additional tools.
These channels can be cut to size to cater for even the most awkward positions such as plug point in the wrong place.

Benefits of Using Cable Channels in Your Workspace
Self-adhesive cable channels significantly enhance safety and productivity by preventing tripping hazards and reduce the frustration that comes from tangled wires. Find your work environment more streamlined and pleasant, which can lead to increased focus and efficiency.
Tip: To adhere self adhesive cable channels: clean and dry the surface. Attach cable channel and press firmly. Use a warm hairdryer to assist in adhesion.
How to remove a self adhesive cable channel
Similarly to remove the channel without damaging workspace surfaces, use a hairdryer to warm up the self adhesive strip. Use fingers to ‘peel’ the tape at the ends, agitating the channel until it releases it grip. The channel should remove quite easily.
Step 1: Assessing Your Cable Management Needs
One of the first steps to enhance a workspace involves assessing cable management needs. Evaluate the existing cable layout and identify which areas are visually cluttered and in need of organization.
Identifying Cluttered Areas
Identifying cluttered areas is crucial for effective organization. Examine the workspace, focusing on locations where cables tend to pile up, leading to distractions and safety concerns.
Determining the Types of Cables to Organize
To determining the types of cables to organize, take stock of the various cables present in the workspace. This includes charging cables, audio/video cables, and data cables.
| Type of Cable | Purpose |
| Power Cables | Supply electricity to devices |
| USB Cables | Connect peripherals to computers |
| Ethernet Cables | Provide internet connectivity |
| HDMI Cables | Transmit audio and video signals |
| Audio Cables | Connect audio devices |
Categorize cables based on type and usage.
- Power Cables
- USB Cables
- Ethernet Cables
- HDMI Cables
- Audio Cables
Step 2: Selecting the Right Cable Channel
Many factors come into play when choosing the right self-adhesive cable channel for an enhanced workspace. From size and length to material and aesthetics.
Size and Length Considerations
On selecting cable channels, consider the actual cable and wire length that needs organization. Take measurements of the workspace to ensure that the width, height, and length of the cable channel align with setup requirements.
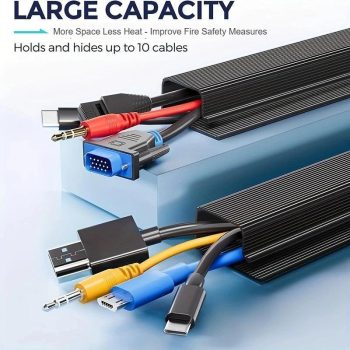
To house up to a mix of 10 cables a cable channel of at least 2.75 inches high is suggested. When packing in HDMI and Ethernet cables, consider reducing the amount.
Check that cables are not stacked to tight in order to allow air flow. This will help to reduce the chance of wires running warm.
Step 3: Preparing Your Workspace
Before commencing the installation of a self-adhesive cable channel, ensure that all necessary tools and materials are readily available.
How to Clean the Surface
Surfaces must be free of dust, debris, and grease to guarantee strong adhesion for the cable channel. A clean surface ensures that the adhesive bonds effectively, prolonging the life of the installation. Employ a gentle cleaning solution and a microfiber cloth to prepare the area adequately.
The best cleaning solution is isopropyl alcohol (rubbing alcohol), as it effectively removes dirt, grease, and residue without damaging most desk surfaces, ensuring a strong adhesive bond.
Safety: Choose a concentration of 70% isopropyl alcohol for most cleaning tasks.
Application: Apply a small amount of alcohol to a clean cloth and wipe the area where you plan to attach the cable channel.
Test on an inconspicuous area:
Always test the cleaning solution on a small, hidden part of your desk or work surface first to ensure it doesn’t damage the finish.
Step 4: Effective Installation
Step-by-Step Installation Guide
Installing a self-adhesive cable channel is straightforward when following these steps:
| Step | Action |
| 1 | Clean the surface area where the channel will be applied. |
| 2 | Measure and cut the cable channel to the desired length. |
| 3 | Peel off the adhesive backing from the channel. |
| 4 | Position the channel against the wall and press firmly. |
| 5 | Allow adhesive to set for optimal durability. |
Tips for a Secure Adhesion
- Ensure the surface is clean and dry before application.
- Press firmly and evenly across the entire length of the channel.
- Apply gentle heat from a hairdryer or heatgun.
- Allow at least 24 hours for the adhesive to cure before adding cables.
Ensure that the surface is not only free from dust but also suitable for adhesive application.
- Smooth, flat surfaces yield the best results.
- Avoid high-humidity areas that may weaken adhesive strength over time.
- Consider using a heat source such as a hairdryer or heat gun, if necessary, to improve adhesive grip.
Step 5: Organizing and Securing Cables
All cables should be organized and secured. Properly managing cables can also reduce wear and tear on the wires. This step ensures easy navigation of work areas, and keep devices powered without distractions. Using appropriate tools like cable ties or clips is vital in achieving an efficient cable management solution.
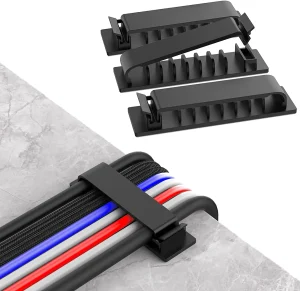
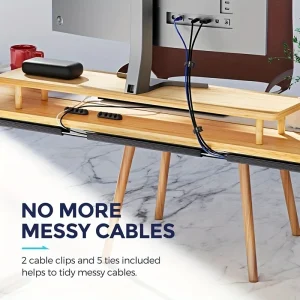
Using Cable Ties and Clips
To optimize cable organization, incorporate cable ties and clips to bundle wires neatly. Grouping cables together, prevents tangling and will most certainly create a streamlined look.
Ensuring Future Accessibility
Consider future accessibility by ensure that cables can be added or removed without significant disruption to the existing setup, making it easier to upgrade or reconfigure workstations as needed.
Accessibility plays a significant role in managing cables effectively. This involves leaving some slack in the cables, positioning outlets conveniently, and using detachable connectors if possible. By doing so, ensures that maintenance, additions, or adjustments to the workspace can be conducted swiftly, supporting a dynamic work environment that adapts to evolving needs.
To wrap up
With this in mind, enhance workspace effectively by implementing a self-adhesive cable channel to streamline living spaces and work areas, reducing clutter. Self adhesive cable channels are a quick and easy solution to the eyesore of a tangle of cables and cords.
The top 5 tray tables: Clever and Affordable
Jan 28, 2025
Further reading

The top 5 tray tables: Clever and Affordable
Jan 24, 2025

7 ways to update a room for less than $15
Jan 24, 2025
Leave a comment